Painting and Pencil (Pixel) Tools
Acorn has two drawing tools: Painting / Brushing b and Pencil n. Brushes are used primarily for painting and drawing because they create soft, smooth lines. The pencil is most useful for when you are zoomed in and you need to edit single pixels. The pencil has sharper edges than the brush tool and can do a couple of compositing tricks that the brush can't (and this is why the pencil tool is sometimes known as the "pixel tool", it can replace individual pixels with the copy blend mode).
The Paint Tool
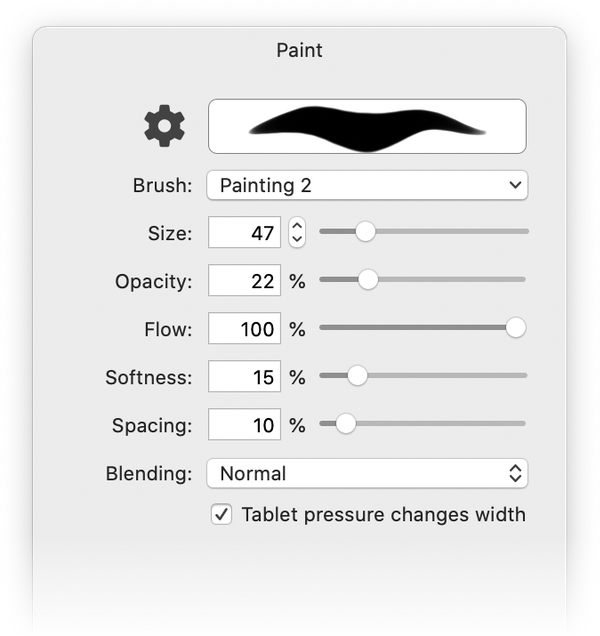
When you click on the paint tool (shortcut key b), you can adjust the size and opacity of the brush in the Inspector Palette. You can also turn on and off the tablet pressure. To change the color of the paint brush, click on the color well in the tools palette.
Here’s what the various options in the brush palette do:
- Brush Popup: Allows you to pick a saved brush preset.
- Size: Changes the diameter of the brush.
- Opacity: This controls the opacity of the brush stroke as it’s drawn to a layer. Think if it as if you’re drawing a piece of glass that is blended with the layer after you finish your brush stroke.
- Flow: This controls the amount of color / paint that is blended with each dab of the brush. Try setting it very low (~5%) to get softer blending of colors.
- Softness: This adjusts the edges of the brush so that it’s either soft or harder.
- Spacing: Adjust the amount of spaces between dabs. A small number makes a very tight and precise brush. Larger numbers will make your brush strokes appear as polkadots.
- Blending: This is how the color blends/composites with any pixels below it, including previous brush strokes.
Stylus Options:
- Tablet pressure changes opacity: When using a stylus or tablet (such as one from Wacom), this option will change the transparency of a brush dab with the amount of pressure you use with a stylus.
-
Tablet pressure changes width: The same as the previous option, but it changes the width / diameter of a brush dab with stylus pressure.
-
Velocity changes width: You don’t need a stylus for this one - the faster you move your brush stroke, the thinner the dabs will be.
- Strength (for Velocity): This adjust how much thinning the velocity option will use.
Shortcuts for modifying brush size
- Hold down the control and option keys at the same time while clicking on the mouse and moving it left (to decrease size) or right (to increase size).
- Hold down the [ key (left bracket) to decrease size, and the ] key (right bracket) to increase size
- Hold down control-option-command and move the brush to change the softness.

If you click on the brush drop down menu, a list will appear for selecting different types of preset brushes. You can select from brushes, pens, pencils, and more.
Clicking on the brush action item to the left of the brush preview will bring up the Brush Designer for even more brush options.
Pro Tip
You can quickly convert any brush to an eraser just by holding down the back-tick key ` before brushing.
Importing Photoshop Brushes
To import a photoshop brush (.abr file), just drag and drop the brush file onto the Acorn icon in the dock when Acorn is open. The brush will then be located under “Imported” in the brush preview window.
If you encounter a brush that doesn’t seem to import correctly, let us know!
Pencil
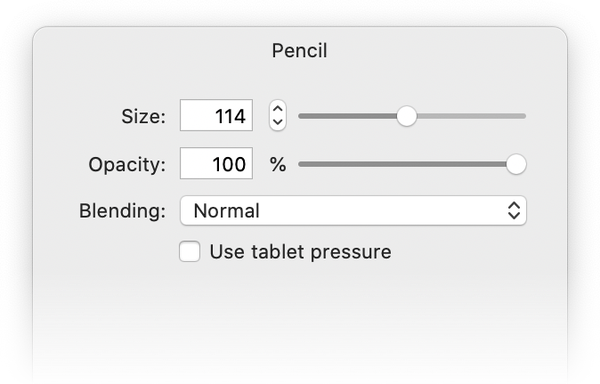
The pencil tool (n) can be changed in size and opacity, and the blending mode can be set via the drop down menu.
The blending mode drop down menu includes a 'Copy' setting. 'Copy' erases the pixels you draw over and replaces them with the currently selected color. This is especially useful if you're using a color with alpha in it.
You can change the color of the pencil by clicking on the color well in the tools palette.
Acorn's Brush Designer
To the left of the brush preview window there is a brush icon. Clicking on this will open the brush designer which allows you to customize and save your own brushes. Alternatively, you can bring up the brush designer by clicking on the Window ▸ Brush Designer menu item.
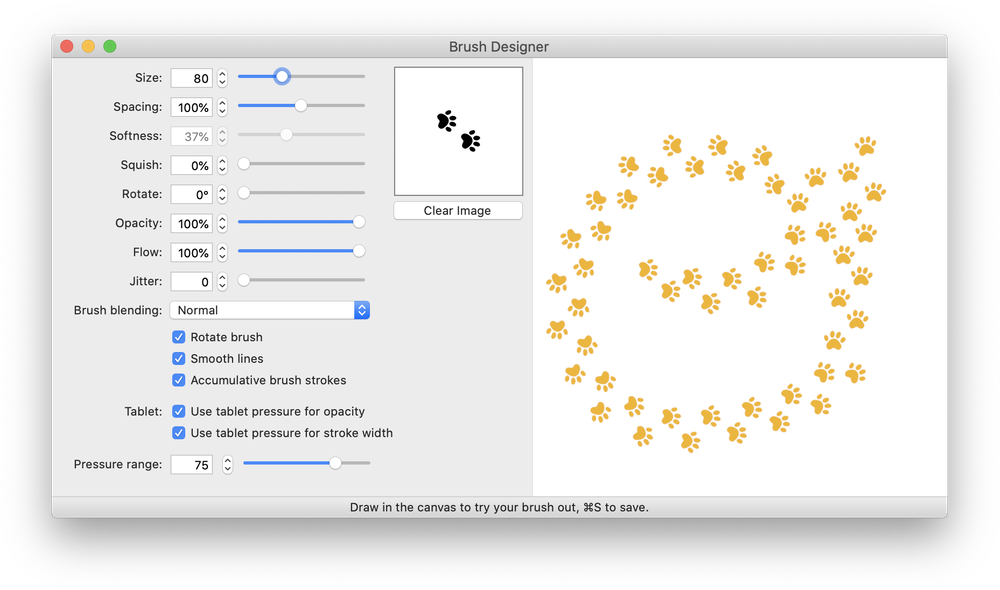
Here is a rundown of the various options:
- Size: This is the width and height of your brush. To make your brush bigger or smaller, modify this setting.
- Spacing: Acorn uses a dabbing (also known as stamping) method for its brushes. In essence, a brush stroke is a whole bunch of stamps of the same image over and over again. The spacing option decides how close together those stamps appear.
- Softness: This option alters the brush stroke to have a softer or harder edge.
- Squish: Do you want your brush to have a a slight angle to it, like a felt tip pen might have? Use this option to decide how much of an angle.
- Rotate: This will rotate your brush dab to your desired angle.
- Flow: The flow slider adjusts the amount of paint the brush applies with each stroke.
- Jitter: This option adds a range of randomness to your brush strokes.
- Use Image…: If you have a pre-existing image you would like to use as the brush, select 'Use Image'. Alternatively, the stamp preview will allow you to drag and drop images into it. You can make a brush pattern in Acorn, and then drag and drop the image into the Brush Designer preview. You can also paste an image into the brush designer canvas to create your brush.
- Brush blending: Control how the brush strokes are applied to your image. Use Multiply for a felt tip pen feeling, or Darker if you want your brush strokes to add darkness to the image. Use Destination Out to create an eraser brush.
- Rotate brush: This will rotate the brush depending on the direction you are drawing. This feature works great with custom brushes.
- Smooth lines: With this option turned on, Acorn will try and smooth out any edges it finds when drawing. This is especially useful when drawing with the mouse.
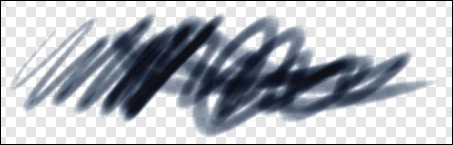
A brush with blending set to multiply:
Tablet and Stylus Options
- Use tablet pressure for opacity: When this is turned on Acorn will make your brush strokes more or less opaque, depending on the pressure you use with your tablet stylus.
- Use tablet pressure for stroke width: When this is turned on Acorn will alter your brush strokes to be thicker or thinner, depending on the pressure you apply with your stylus.
- Tablet pressure range: This slider alters the minimum bound for the pressure sensitive options. If you find that there is too much range in the stroke width, you can change this setting to make your brush strokes thicker.
Saving a Custom Brush
To save your brush, type ⌘S and a sheet will appear asking you for a name and category for the brush. You can add your brush to an existing category, or create a new one. If you purchased Acorn from the Flying Meat Store, custom brushes are saved to your ~/Library/Application Support/Acorn/Brushes/ folder. If you purchased Acorn from the Mac App Store, the App Support folder has been moved to: ~/Library/Containers/com.flyingmeat.Acorn/Data/Library/Application Support. You can exchange your brushes with friends over email simply by sending them your saved brush from the Finder. You can also delete brushes you have created from the Finder.
Deleting a Custom Brush
Acorn comes with a number of built-in brushes which cannot be deleted. To delete a custom brush, you can navigate to the ~/Library/Application Support/Acorn/Brushes/ folder. Move the brush you want to delete to the trash. Alternatively, you can go to the brush drop down menu in Acorn. Select the brush you want to delete while holding down the option key. A pop-up window will appear confirming whether you want to delete the brush.
Additional Relevant Documentation
Paint Tool Basics (video tutorial)
Custom Brushes